 This post is going to discuss how to make a complete simple lapbook. The use of a folder is optional. The minimum materials required are:
| In homeschooling, there are two terms which should not be confused: lapbooking and notebooking. Lapbooking is colorful, kinesthetic, and probably appeals more to right-brain learners. Notebooking fits the themes of classical education, can improve penmanship and spelling, and likely appeals more to left-brain learners. Those are general statements, not strict rules, but observations I've made. While notebooking involves a lot of writing for the student, lapbooking can cut down on the writing aspect of traditional assignments, such as book reports. 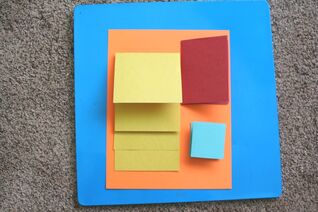 If you have colored paper on hand, it is a lot more engaging! Here's one side of a completed (but blank) lapbook page. Students could fill in information about ANY topic they are studying, reviewing or interested in inside each of the elements. Using clipart, stickers, and flat objects like feathers & buttons is fun for pre-K students. They love to show this project to others. |
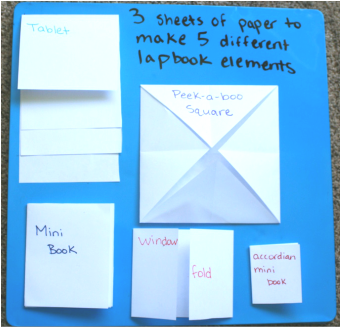
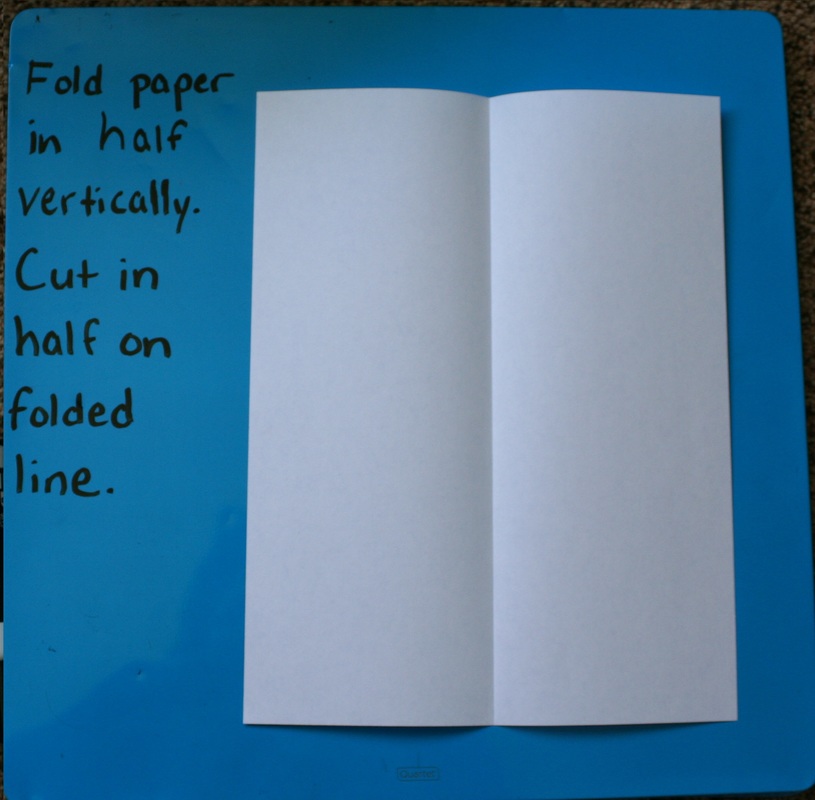
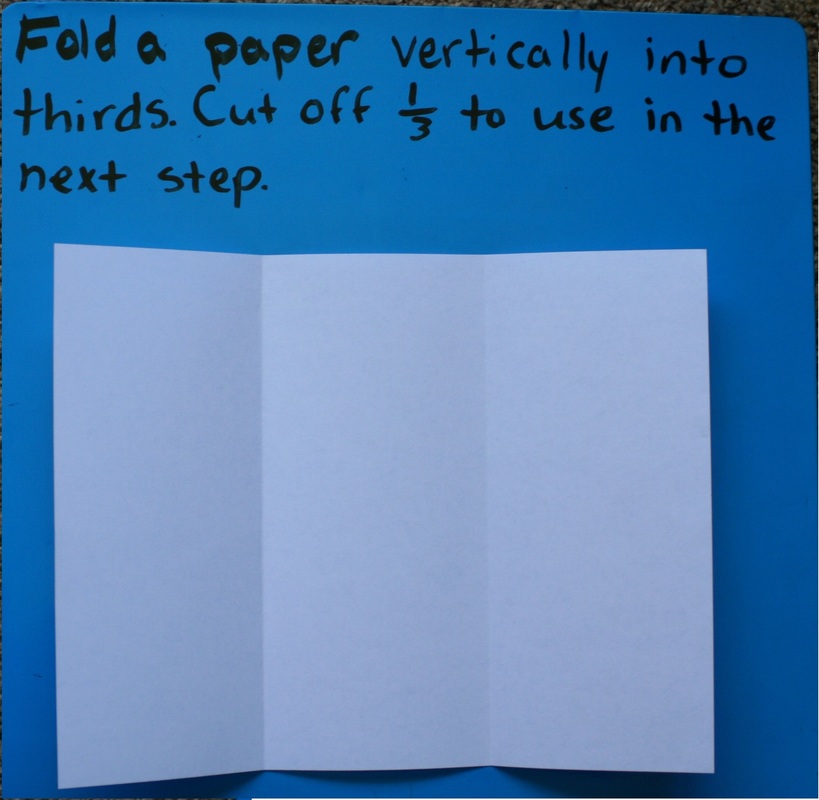
Okay, pull out your first piece of paper. I made these lapbook elements with both 8.5x11" letter-sized copy paper and also with 9x12 colored construction paper. The instructions work for either size. Hover your mouse pointer over the picture to view typed instructions.
Paper #1 becomes a Tablet
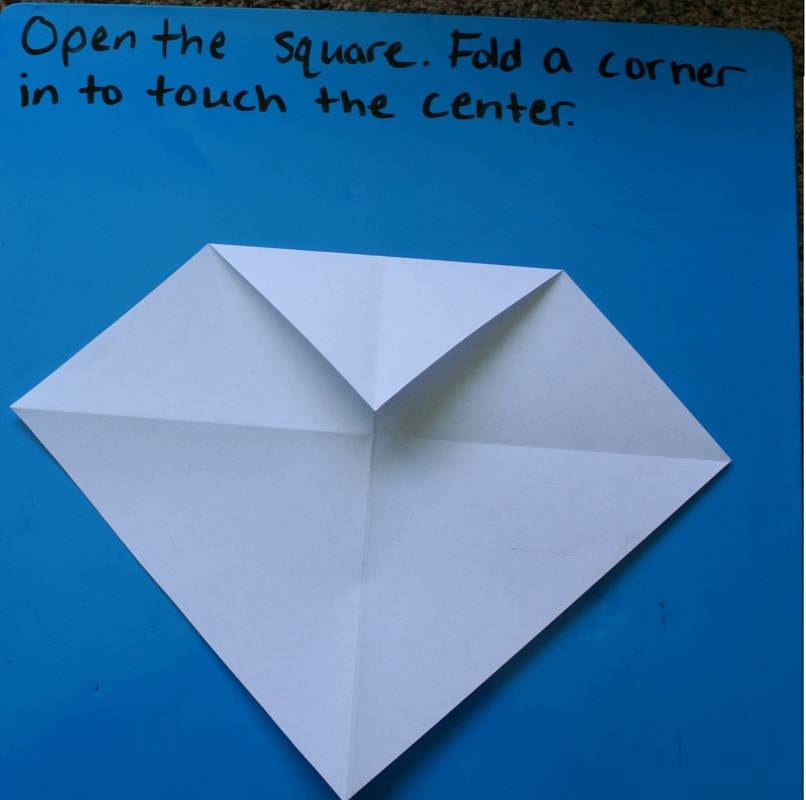
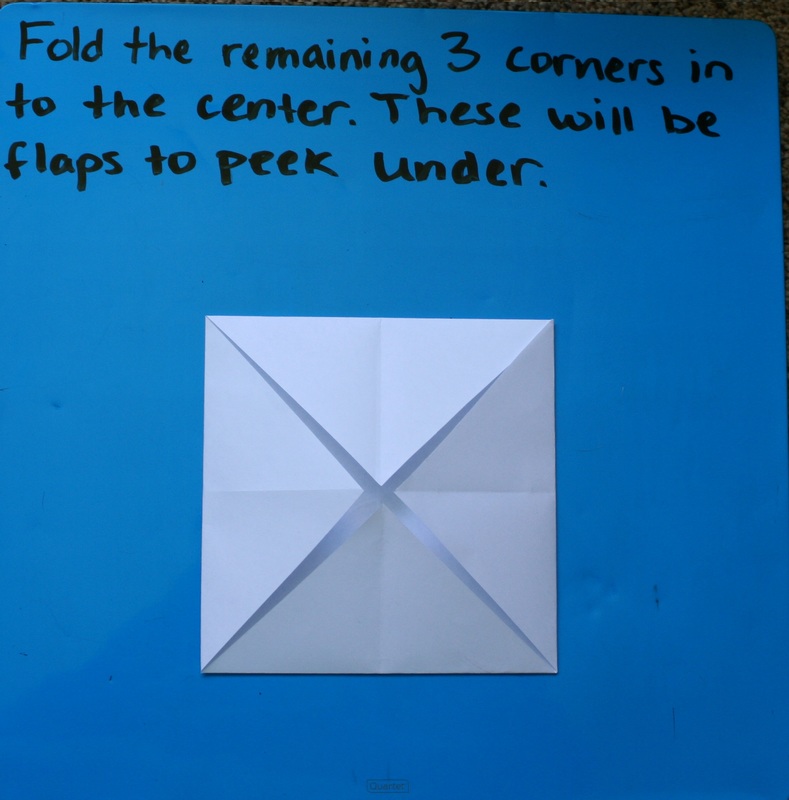
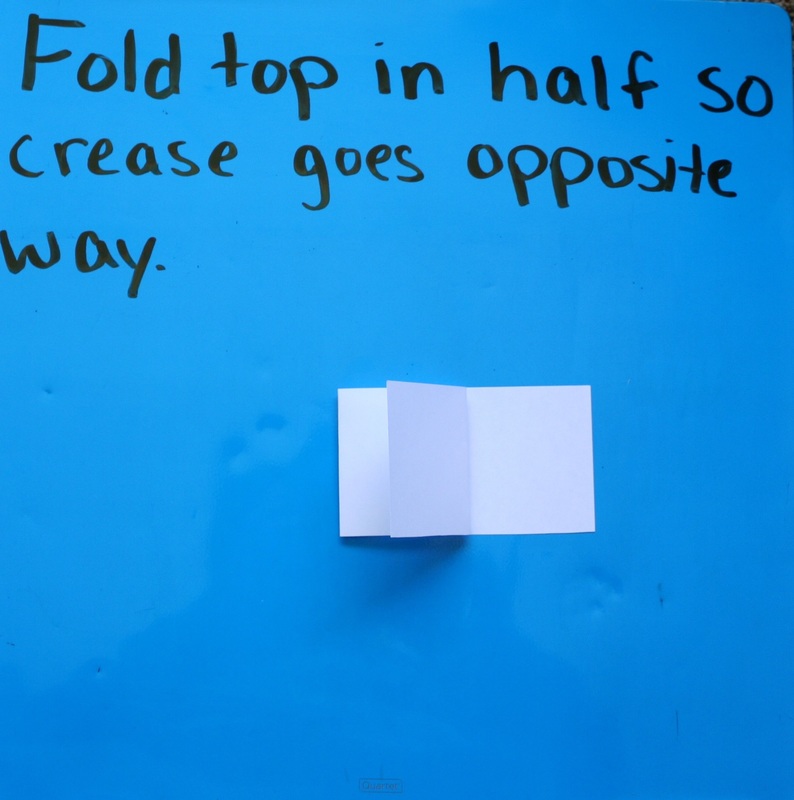
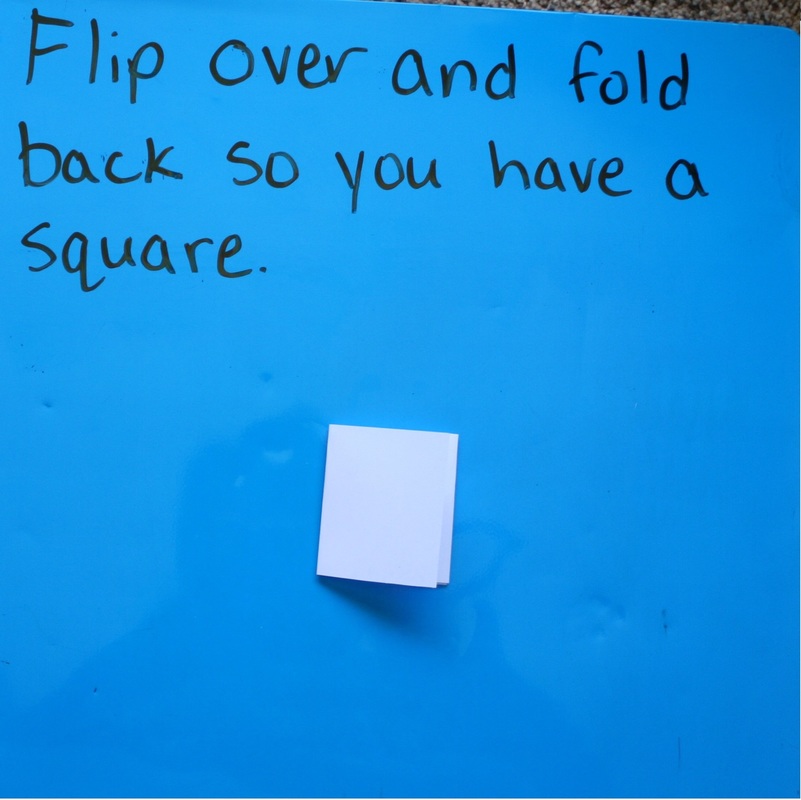
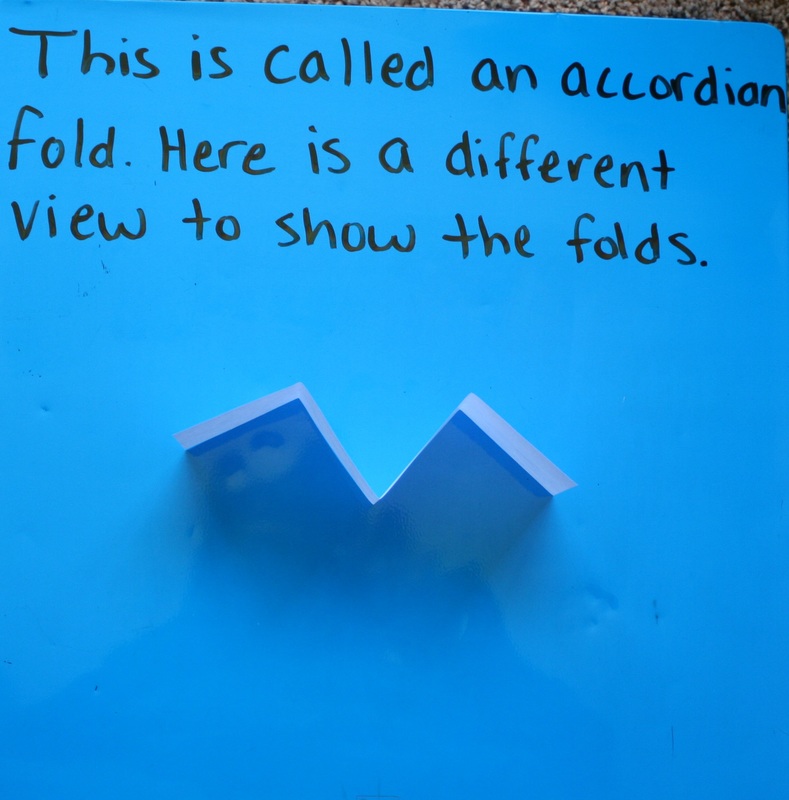
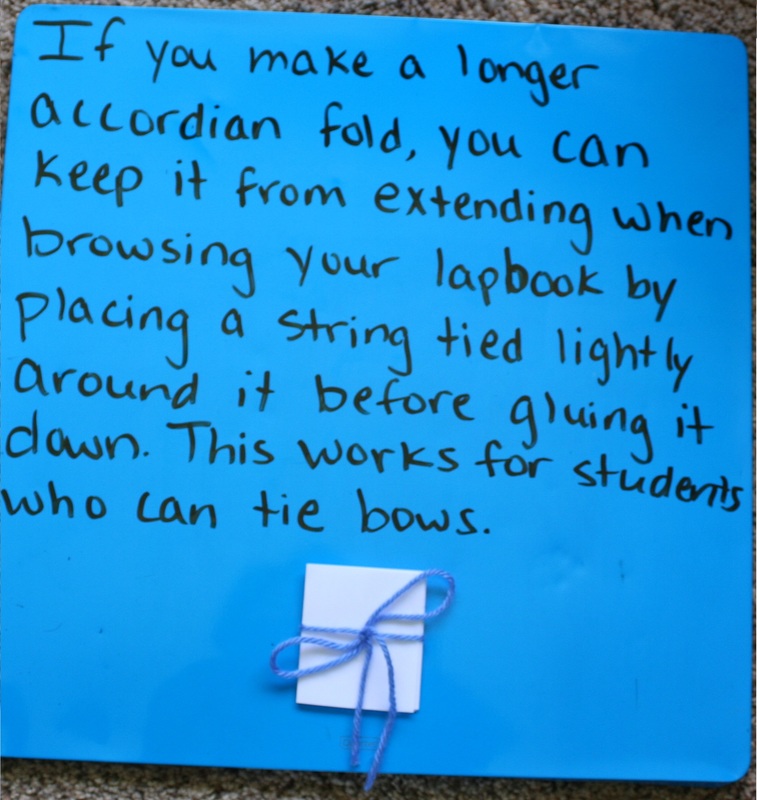
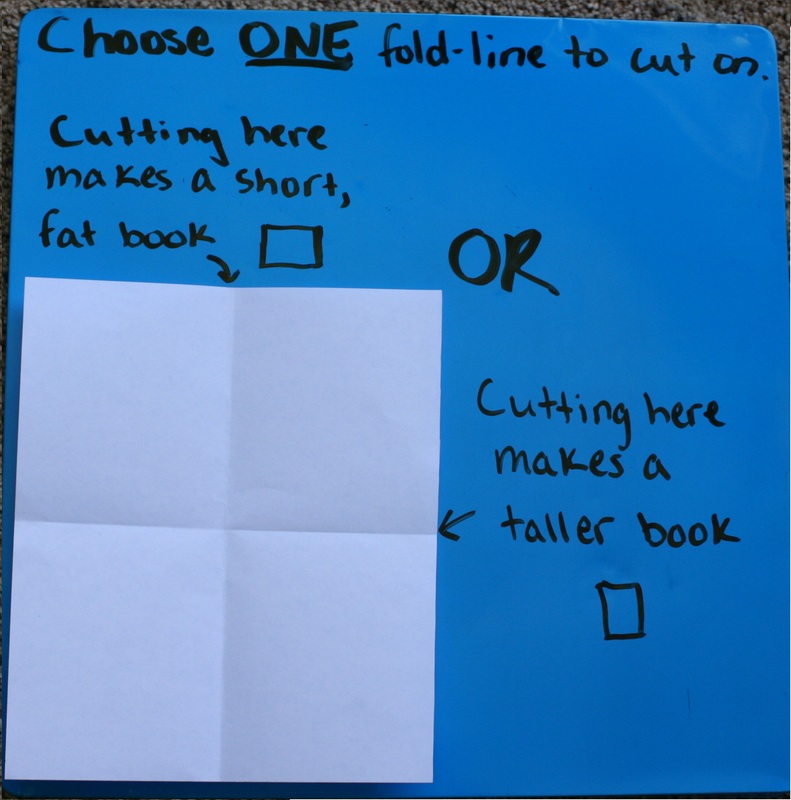
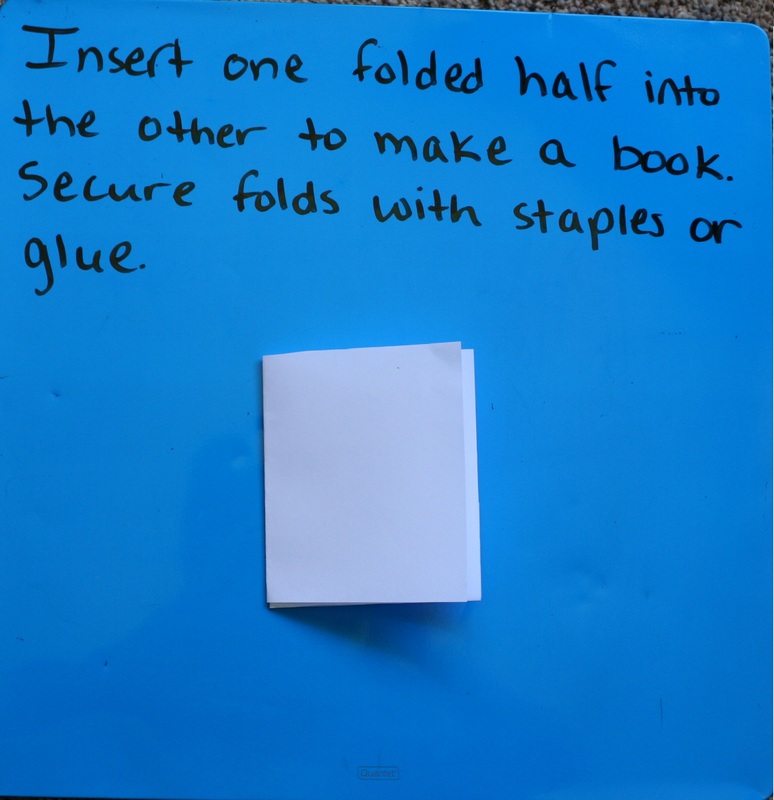
Paper #2 becomes a Peek-a-boo Square and Accordion Mini Book
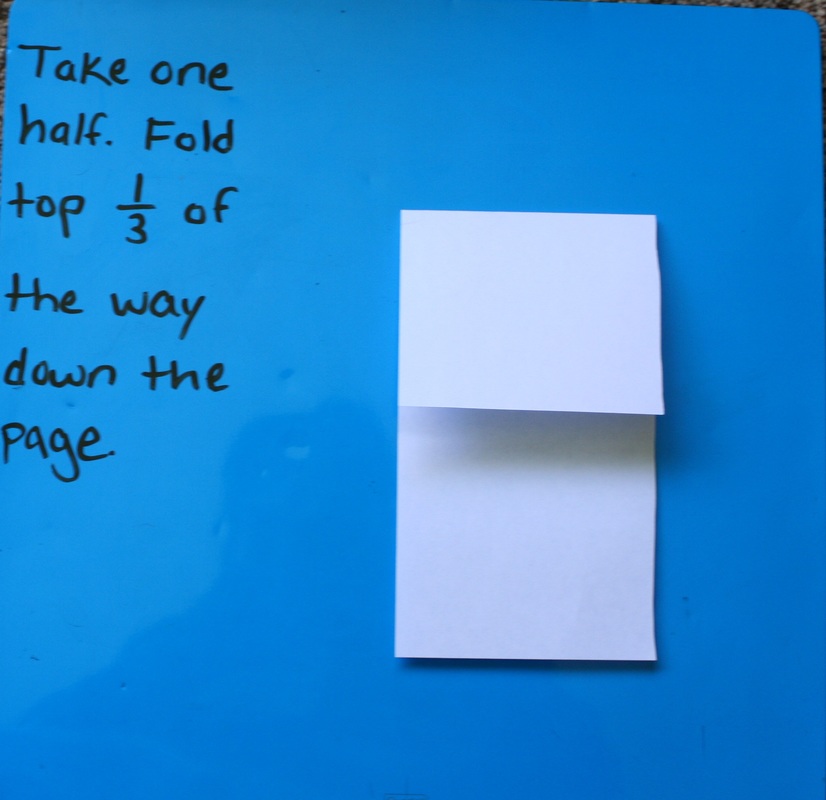
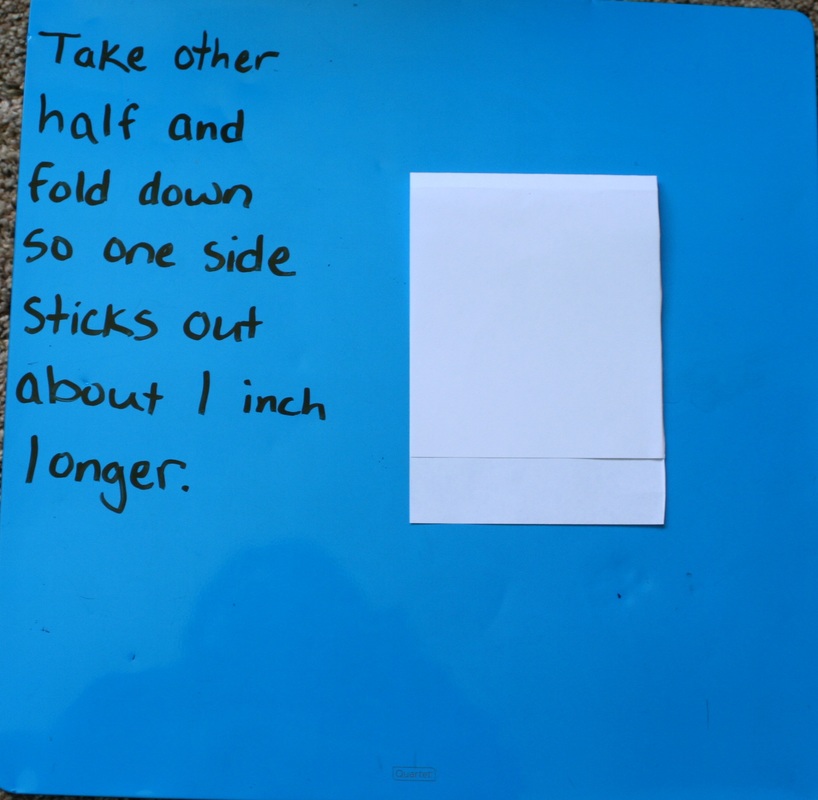
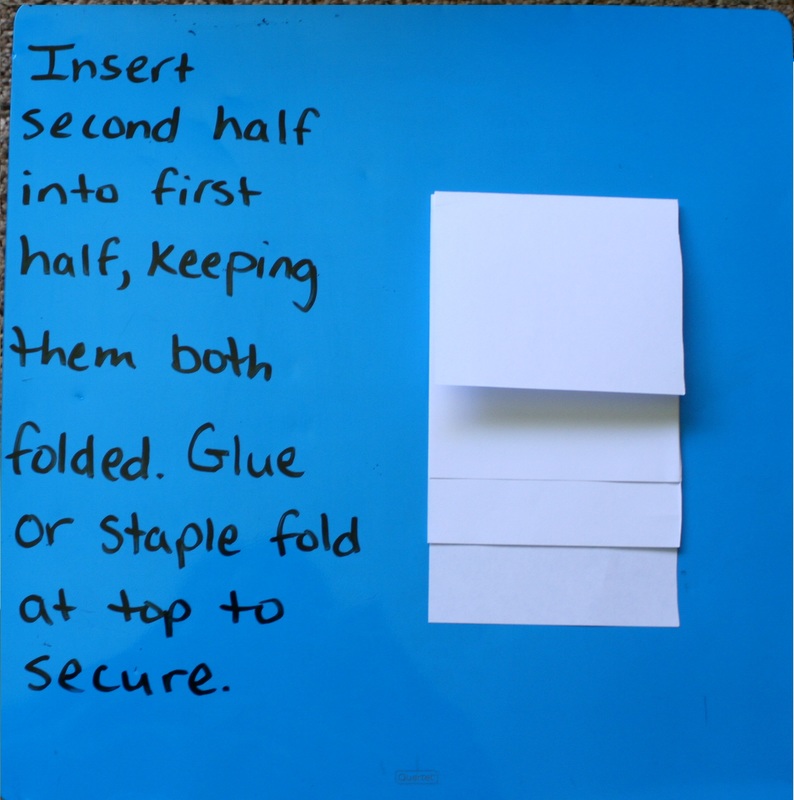
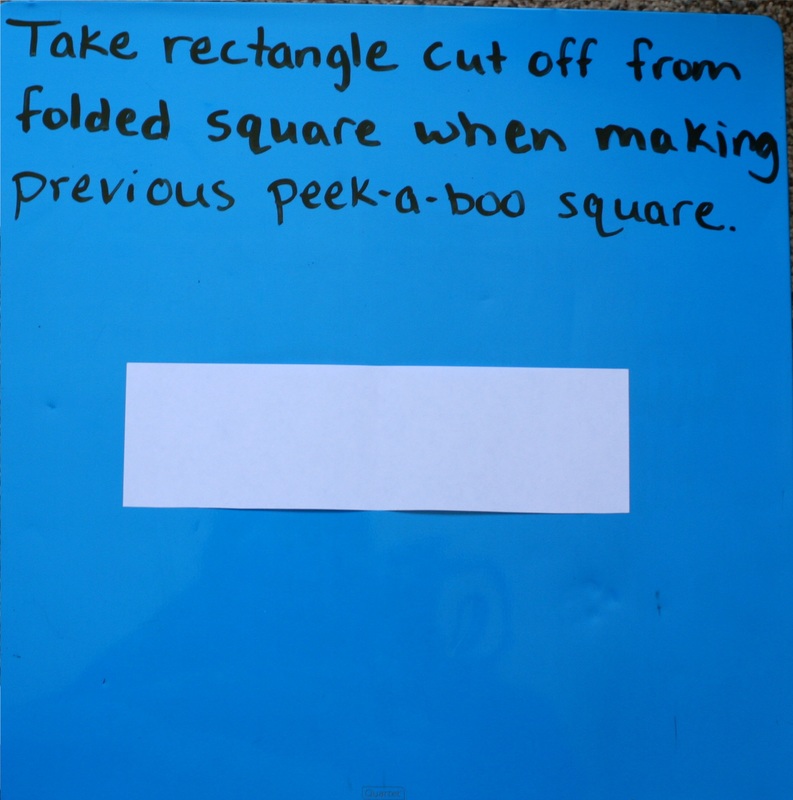
First, let's make the Peek-a-Boo Square. Don't discard the rectangle you cut off the side, that's what you'll use to make the Accordion Mini-Book.
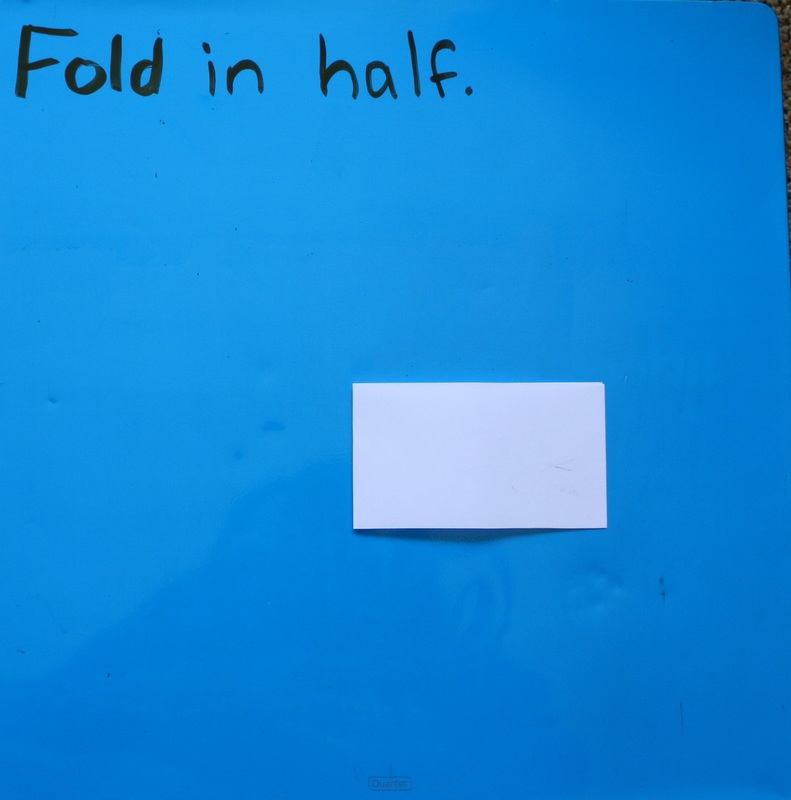
Now, remember that rectangle you cut off in step 1 of making the Peek-a-Book Square? Get it out!
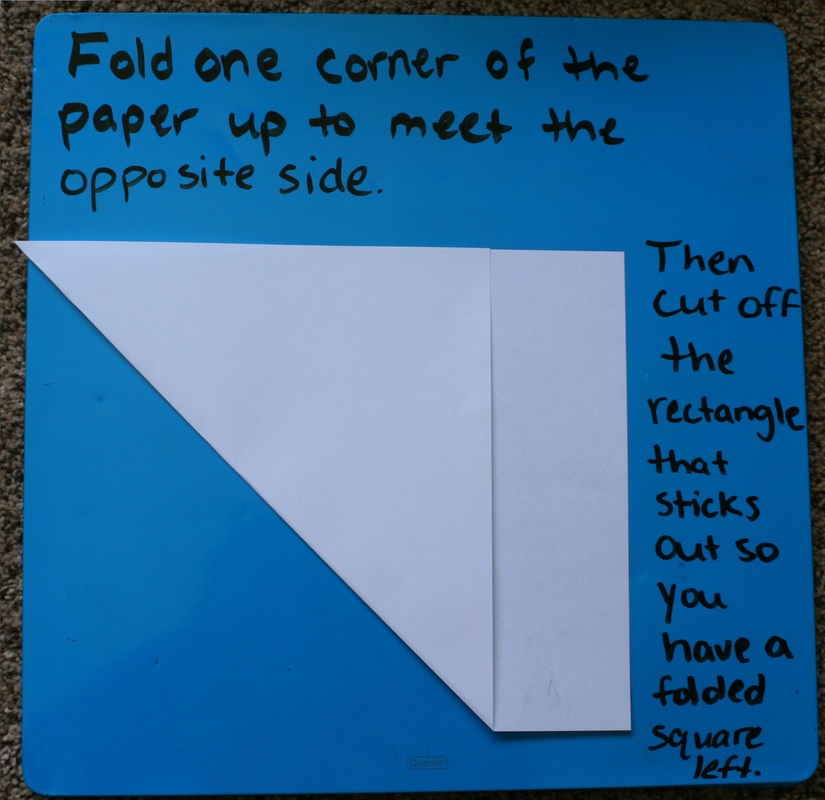
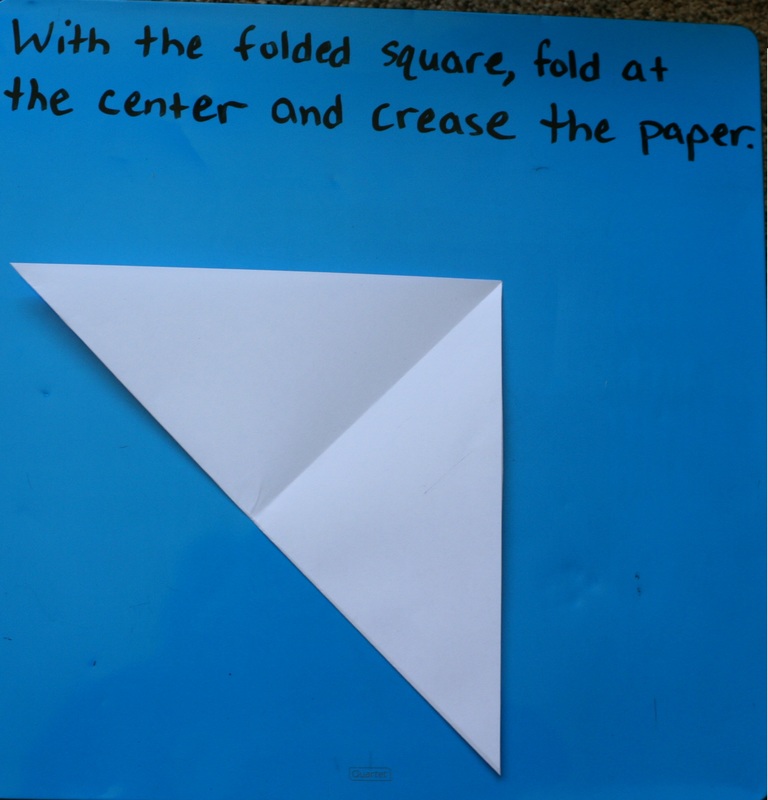
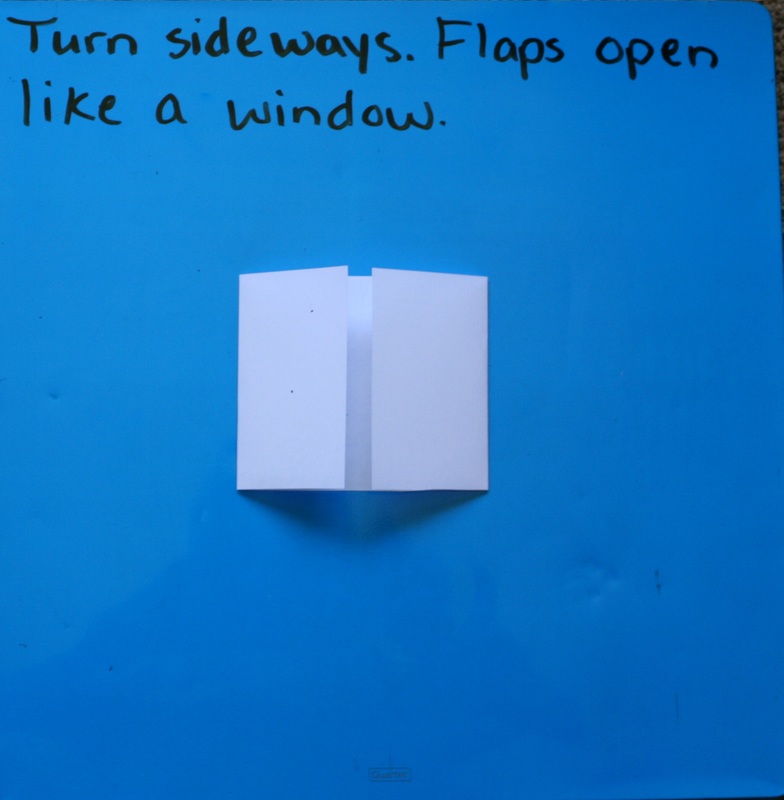
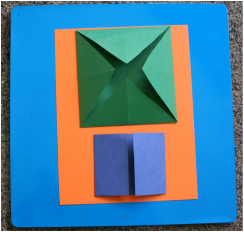
Paper #3 becomes a Window Fold and Mini-Book
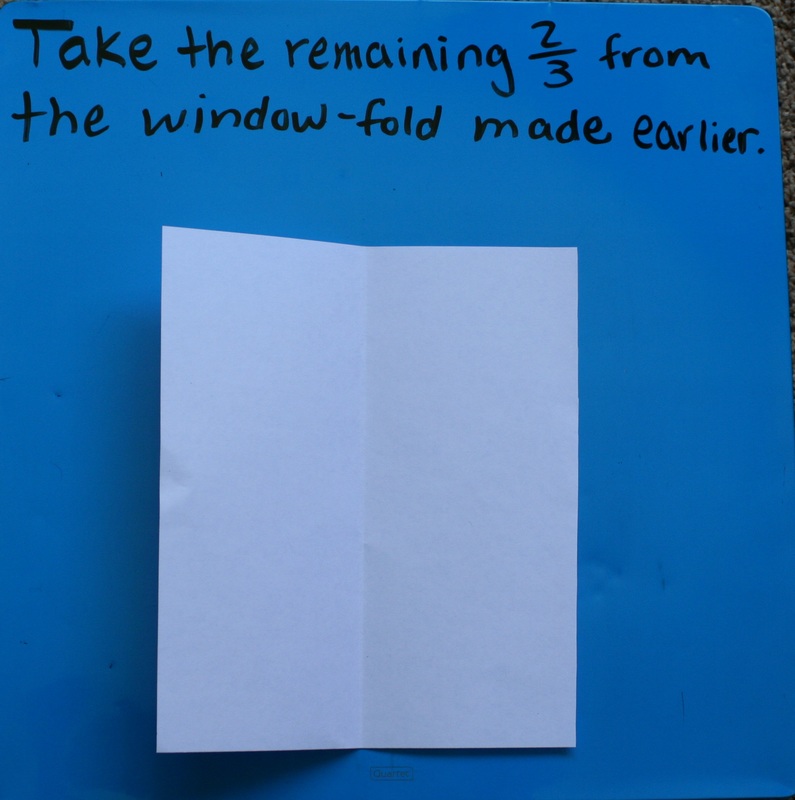
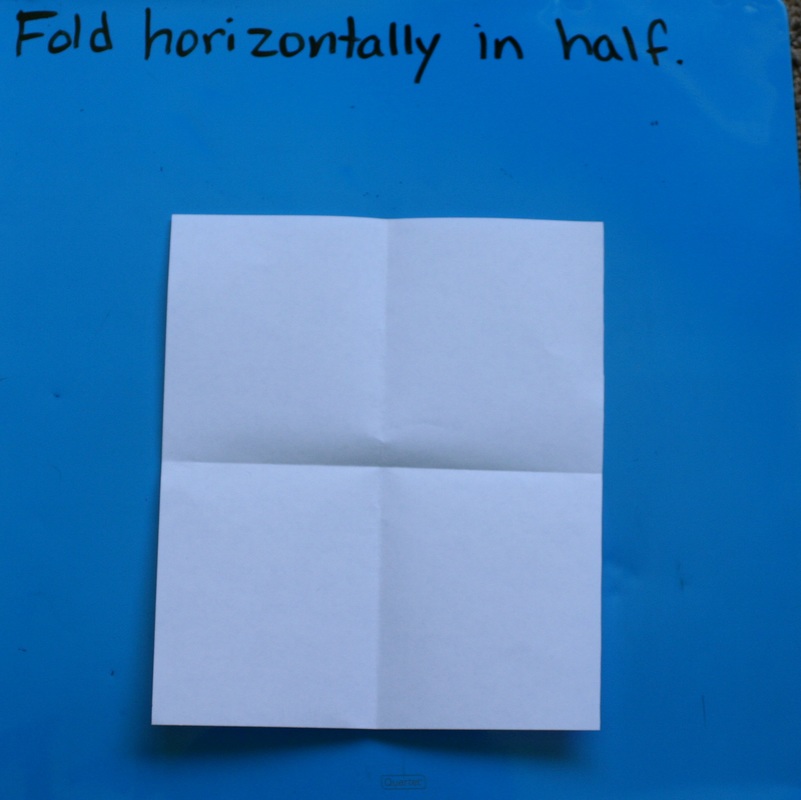
First, we'll make the Window Fold. Again, keep the paper you cut off.

Now for the Mini Book:
Paper #4: The Cardstock (or Folder)
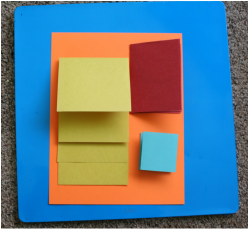
The cardstock can be used instead of a folder as a surface to mount the lapbook elements onto. The orange cardstock shown below (one picture shows the front side, the other shows the reverse side) demonstrates how all 5 of the lapbook elements we made today can fit nicely onto one letter-size paper. If you leave a bit of room on the left-hand side, you can hole punch the cardstock and store it in a 3-ring binder. We made one lapbook page per letter of the alphabet and they all fit nicely into a 1" binder for our enjoyment and review.
If you've got a folder, simply open it flat so the interior is facing you, and do a window fold on the folder. Here's an example of what that looks like with a single folder (first two images on the page) and an example of how to put an "extension" in if you need a bit more room in your lapbook.
Here is how to link three (or more!) folders together for a larger lapbook.
 |  |
Now for the Fun!
Whether your student did the folding along side you, independently after some instruction, or you did the folding yourself to prepare, now your student gets to be involved. Have the student decide which lapbook element will best suit the information they want to put inside. Do you have 3 facts about the Digestive System? You could write them in the Tablet and put a title or picture on the front. Do you have a drawing about the First Thanksgiving? It might look nice in the Window Fold. Four vocabulary words? Put them on the flaps of the Peek-A-Boo Square and write the definitions under each flap. As I mentioned above, feel free to use stickers, pictures (we like to print black and white clipart and then color them ourselves with colored pencils), or flat objects to cut down on writing. Teacher can help write if desired. These are totally customizable. There really is no wrong way. The idea behind lapbooks is to get-your-creative-on to make an engaging way to remember, review, and show off what you've learned.

 RSS Feed
