Supply List: (not all pictured)
| KITCHEN SUPPLIES: Lefsa Grill or Large, well-seasoned Cast-Iron Frying Pan (IF you are using a gas stove) Thin spatula/turner for lifting lefsa (a lefsa turning stick did not work for me) Rolling Pin, Parchment Paper, Paper Towels Pastry cutter, measuring cups/spoons, mixing bowl, cookie sheet/baking pan Hand Ricer or Standing Sieve/Colander with mallet/pestle | INGREDIENTS*: Russet potatoes Sweet White Sorghum GF Flour (I used Bob's Red Mill) Salt Vegetable oil shortening (*This can be made with traditional ingredients using potatoes & salt called for, 1 1/2 cups all purpose flour instead of sorghum flour listed here, and butter in the place of the shortening called for here. Then dough can be formed into golf-ball sized balls and rolled out to 9-12" diameter circles.) |
Step One: Preparing the Potatoes
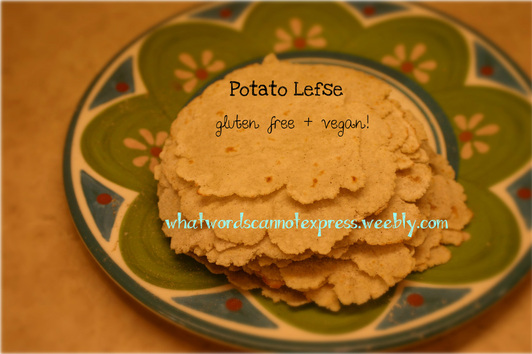
Use only russet potatoes, other potatoes will have a different flavor/texture and may not hold together or achieve the traditional taste in this recipe. I have created this recipe by adapting my Norwegian Grandmother's traditional Lefse recipe to containing only Gluten-Free flour and substituting out the butter.
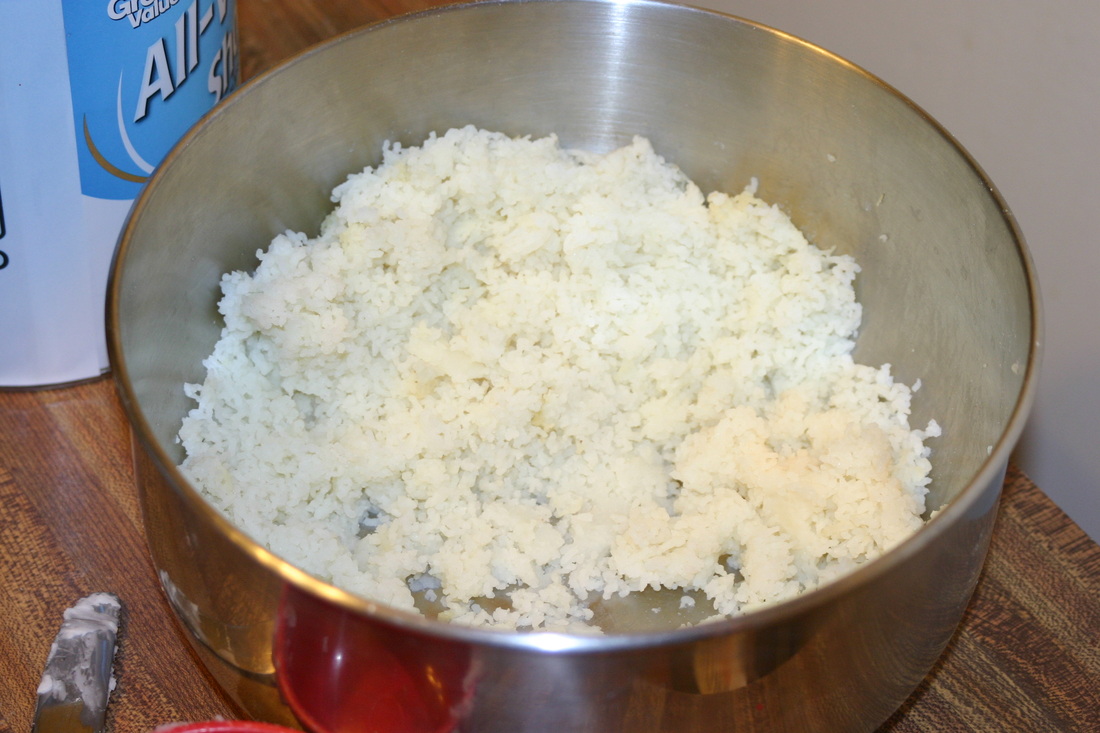
First, peel and cut into chunks 6 medium potatoes. Boil them in salted water until they are tender when pierced with a fork, but do NOT over-cook them until they split apart when pierced with a fork. Drain water off of potatoes and set up a large bowl to rice them into while they are still hot/very warm. (To use a hand ricer, the potato is simply inserted into the opening and the handles are squeezed together to force potato pieces out the bottom and sides. Using a colander, chunks of potato are dropped into the inverted cone while it is in a stand. Placing large bowl under the stand will catch potato pieces as they are pressed out when the wooden mallet is pressed down and around the edges inside the colander.) You will have to experiment with how much potato to put in the ricer at a time, and will need to scrape the outside of either ricer occasionally. When riced, the potatoes will look like this:
First, peel and cut into chunks 6 medium potatoes. Boil them in salted water until they are tender when pierced with a fork, but do NOT over-cook them until they split apart when pierced with a fork. Drain water off of potatoes and set up a large bowl to rice them into while they are still hot/very warm. (To use a hand ricer, the potato is simply inserted into the opening and the handles are squeezed together to force potato pieces out the bottom and sides. Using a colander, chunks of potato are dropped into the inverted cone while it is in a stand. Placing large bowl under the stand will catch potato pieces as they are pressed out when the wooden mallet is pressed down and around the edges inside the colander.) You will have to experiment with how much potato to put in the ricer at a time, and will need to scrape the outside of either ricer occasionally. When riced, the potatoes will look like this:
After all the potatoes are riced, you will need to allow them to cool completely before proceeding. After the potatoes have cooled completely, if you would like to (or need to) cover & refrigerate them for up to 12 hours you may do so. (There are only so many "stopping points" in the process of making lefse where it will not be detrimental to the texture of the outcome, so I will mark them when they occur.)
Step Two: Mixing the Dough
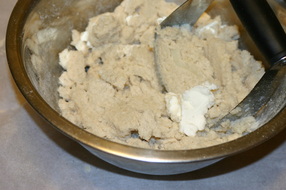
Measure out 6 (lightly packed) cups of cooled, riced potatoes. Use a pastry cutter to cut in 2 Tablespoons of vegetable shortening and 1 teaspoon of salt. Gradually cut in 1 cup of sorghum flour. Use hands to mix 2 more Tablespoons of sorghum flour in thoroughly. Form the dough into balls about the size of a ping pong ball. (I attempted to make golf-ball size ones as I have with the gluten/traditional lefse recipe, but the GF lefsa does not hold together well enough to transfer that large of a lefse.) Place an ungreased cookie sheet in the refrigerator to hold the balls of dough, and cover them lightly with paper towels. Every time you make a ball of dough, set it promptly in the fridge on this cookie sheet. (Prepared balls of dough can be left refrigerated overnight if you didn't leave the riced potatoes to sit overnight in the fridge. If you tried to stretch this process out too long, the potatoes/dough will be too dry and won't work.)
Step Three: Preheating the Griddle & Rolling Out the Lefsa
Preheat the lefse griddle to 500 degrees, or if using a well-seasoned cast-iron pan on a gas stove, set the heat to medium-high (on my stove that is a number 6 out of 9 total). Do not add any oil to your cast-iron, and if there is excess oil or any stickiness, then wipe it dry with a paper towel.
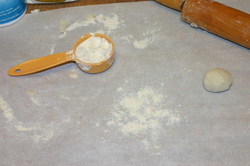
Spread a large piece of parchment paper out on your work surface. Measure 6 Tablespoons of sorghum flour and place in a small bowl or measuring cup nearby where it will be easy to access. This should be an adequate amount of flour to use for sprinkling/rolling out all of your dough. Less is best, but if there isn't enough your lefse will stick to the rolling pin and/or parchment paper and never make it to the griddle!
Pinch a bit of flour and sprinkle it onto your parchment paper and take out a single ball of dough (leave the other dough balls in the fridge while you work). With a scarce amount of flour on your hand, run your hand over your rolling pin to give it a dusting of flour. Use the palm of your hand to flatten out the ball, and then flip it over onto the floured surface of the parchment paper, so that there will be a light coating of flour on both sides of the flattened dough and the rolling pin before you start to actually roll it out.
Pinch a bit of flour and sprinkle it onto your parchment paper and take out a single ball of dough (leave the other dough balls in the fridge while you work). With a scarce amount of flour on your hand, run your hand over your rolling pin to give it a dusting of flour. Use the palm of your hand to flatten out the ball, and then flip it over onto the floured surface of the parchment paper, so that there will be a light coating of flour on both sides of the flattened dough and the rolling pin before you start to actually roll it out.
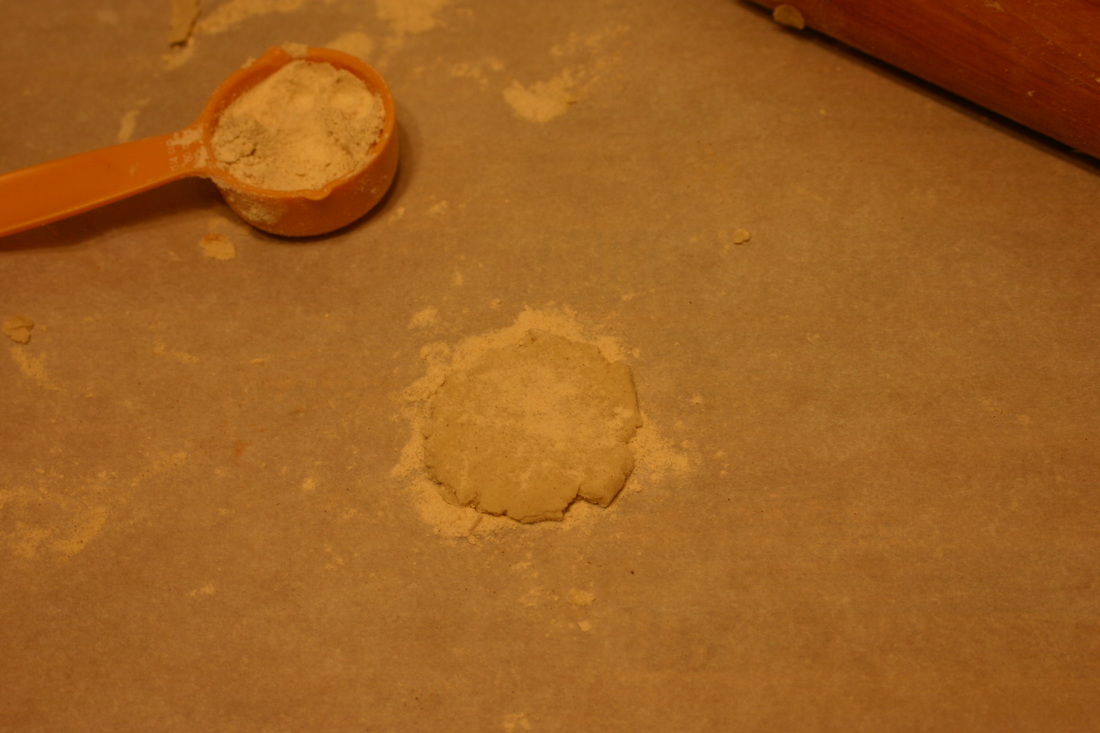
If you've never rolled out lefse dough, let me tell you the secret that my grandmother told me (and I'm sure this applies to anything you'll want to roll out very thin without sticking!): Do not push down or apply any downward pressure on the rolling pin. This takes a bit of patience, but this was my Grandma's admonition: Let the rolling pin do the work.
As the dough warms up, simply rolling the rolling pin (I am talking about a natural wood one, as I've never tried with a non-stick type that is light/hollow- that may require its own trick!) across the dough will soon result in the dough slowly growing into a larger and thinner circle. This is what we want!
As the dough warms up, simply rolling the rolling pin (I am talking about a natural wood one, as I've never tried with a non-stick type that is light/hollow- that may require its own trick!) across the dough will soon result in the dough slowly growing into a larger and thinner circle. This is what we want!
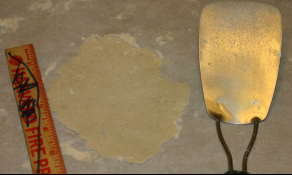 Please excuse the ugly kids' ruler
 At this point of the game, it takes a lot of patience to not just go into autopilot and "roll it out" the way we would sugar cookies, but it is worth the patience now to not have to scrape a lump of dough off the parchment paper and be disappointed you aren't able to fry it AND also have a sticky spot on the parchment to avoid. Continue this until the dough is very thin, about an 1/8" or so. Certainly not 1/4".
For me, this yielded about a 6" round lefse.
For me, this yielded about a 6" round lefse.
Step Four: Frying your Lefse!
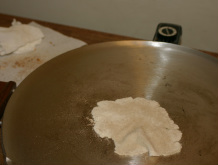
**Using your super-thin spatula/turner, lift the lefsa onto your preheated griddle or cast-iron. Lefsa does not bubble up like a pancake, and if you wait until the edges appear dry, then you will have over cooked it and it will crisp when it cools. What you want to do is to flip it when light golden specks/spots have appeared on the underside. Since lifting the edge will disrupt the heating, you'll just have to do it until you get the hang of it. I timed mine, and it took only 60 seconds to cook to the point of needing to flip it over.
Now that it's frying the second side, you'll need to watch for bubbles/air pockets forming in the dough. If any large ones form, pop them with the tines of a fork. If you do not get a single bubble when cooking the second side, that means you've added too much flour to your dough. Next time you roll one out, be very sparing! The second side will cook very quickly, many of mine were done after only 30 seconds when they were cooked in the cast iron. It took longer on the griddle, but that's because the griddle is electric, so it turns the heating element on and then off repeatedly to maintain a temperature. The way to be certain the second side is done is to check for golden spots, as you did with the first side. Again, don't wait for it to appear dry- if it has the spots, take it off. The doughy spots on the lefse will firm up when it cools.
Now that it's frying the second side, you'll need to watch for bubbles/air pockets forming in the dough. If any large ones form, pop them with the tines of a fork. If you do not get a single bubble when cooking the second side, that means you've added too much flour to your dough. Next time you roll one out, be very sparing! The second side will cook very quickly, many of mine were done after only 30 seconds when they were cooked in the cast iron. It took longer on the griddle, but that's because the griddle is electric, so it turns the heating element on and then off repeatedly to maintain a temperature. The way to be certain the second side is done is to check for golden spots, as you did with the first side. Again, don't wait for it to appear dry- if it has the spots, take it off. The doughy spots on the lefse will firm up when it cools.
Step Five: Repeat, Maintain, Enjoy
Repeat steps 3 and 4 for each of your balls of dough.
Maintain your cooking surface: You will need our to use a natural bristle basting brush or a dry paper towel to wipe the excess flour off of the griddle/cast-iron after every few lefse you cook. Otherwise, the flour left on the griddle will burn and then stick to the new lefse you put on, giving you a burnt flavor. :(
Enjoy: Here's a tidbit of info you may not have known (and you'll only find out if you were able to bear with me all through this super-long post- thanks for reading to the end!): If you taste lefse while it's still warm, it has a strong potato taste. Okay, yes, I know it is made of potatoes, but the taste when it is still warm is VERY different than the end (desired) result, which is a mild, sweet, flexible yummy-ness which is best served with your favorite butter substitute and sugar sprinkled on it, then rolled up jelly-roll style. Sorry, no pictures of the prepared product- we ate them all! The important lesson here is: Don't taste a still warm lefse (or ten still-warm lefse) be dismayed and disappointed that the taste is NOT like the traditional/ Grandma-variety and decide to change up the recipe completely (or even worse, give up!). I did this. Twice. Felt like a fool when I realized it was my impatience that wasn't working out- not the recipe or technique!

 RSS Feed
